How to Flash & Run a project in ChibiStudio
Introduction
This article is a step-by-step guide showing how to reliably flash and run a project in ChibiStudio.
Step by step procedure
Creating the launch configuration
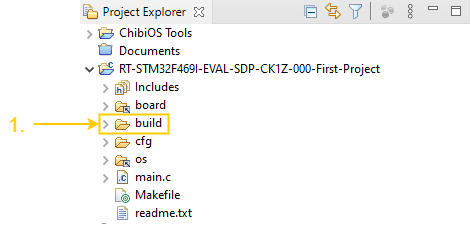
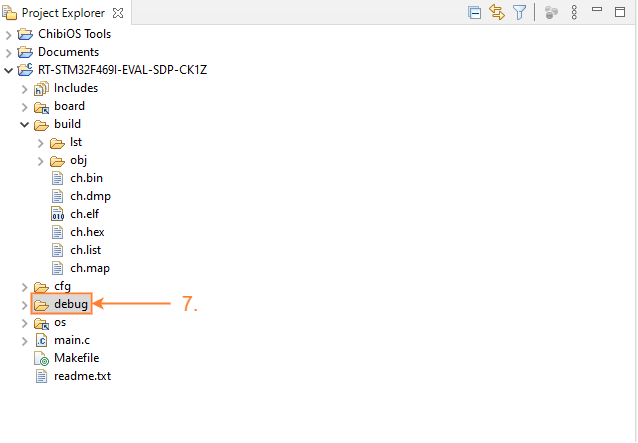
- Check if the build folder exists (if it is a freshly imported project press the hammer button)
- Open the build folder located inside your project folder
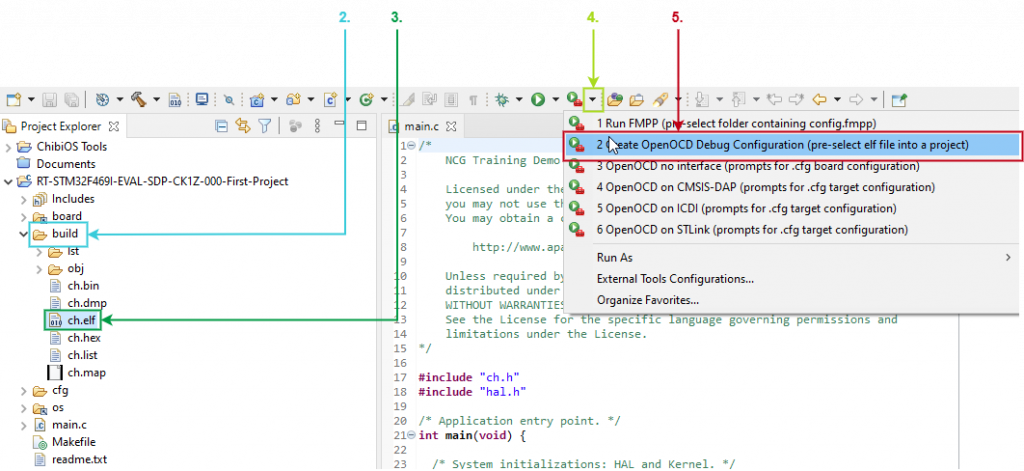
- Select the .elf file
- Go to External Tools menu (downward facing black arrow)
- Select Create OpenOCD Debug Configuration (pre-select .elf file into a project)
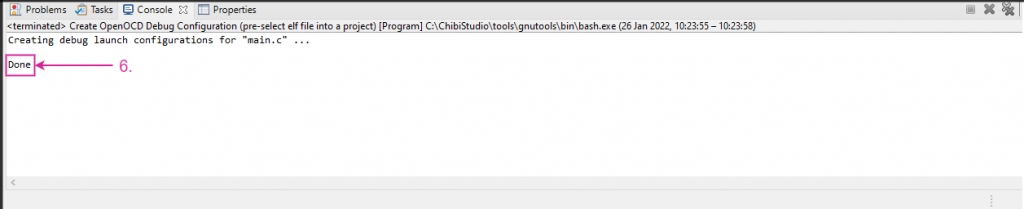
- In the Console window you can read Done
- The debug folder is now visible (a refresh – F5 – of the Project Explorer may be required)
Launching OpenOCD
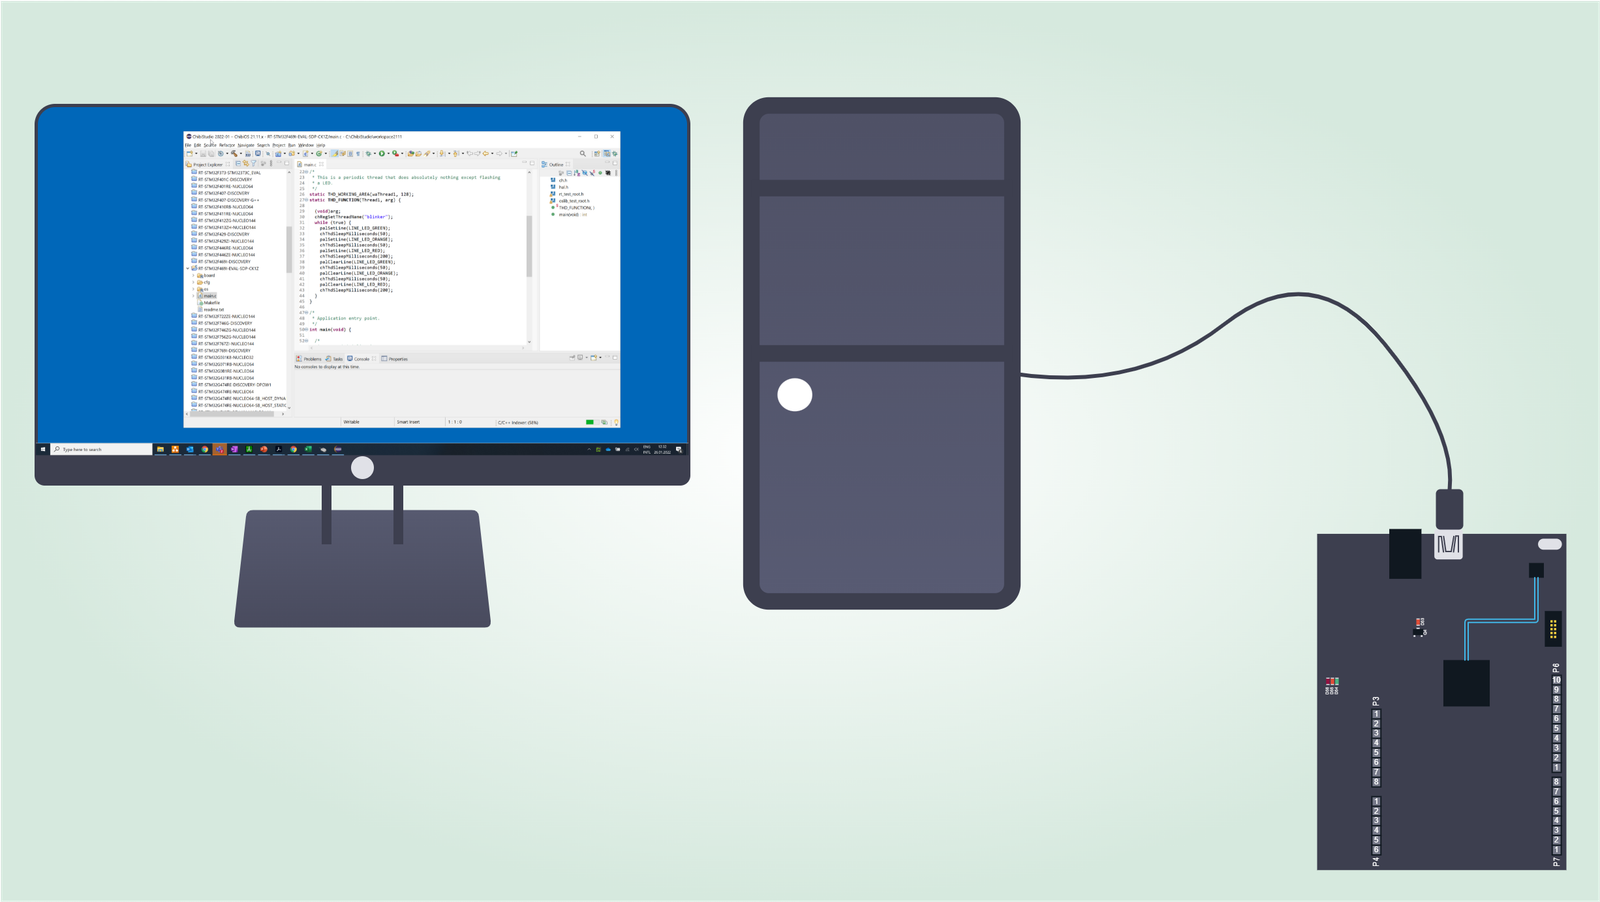
In this example we are going to use an Analog Devices SDP-K1. The board comes with the CMSIS-DAP debugger and an STM32F4 microcontroller.
- Connect microcontroller to your PC
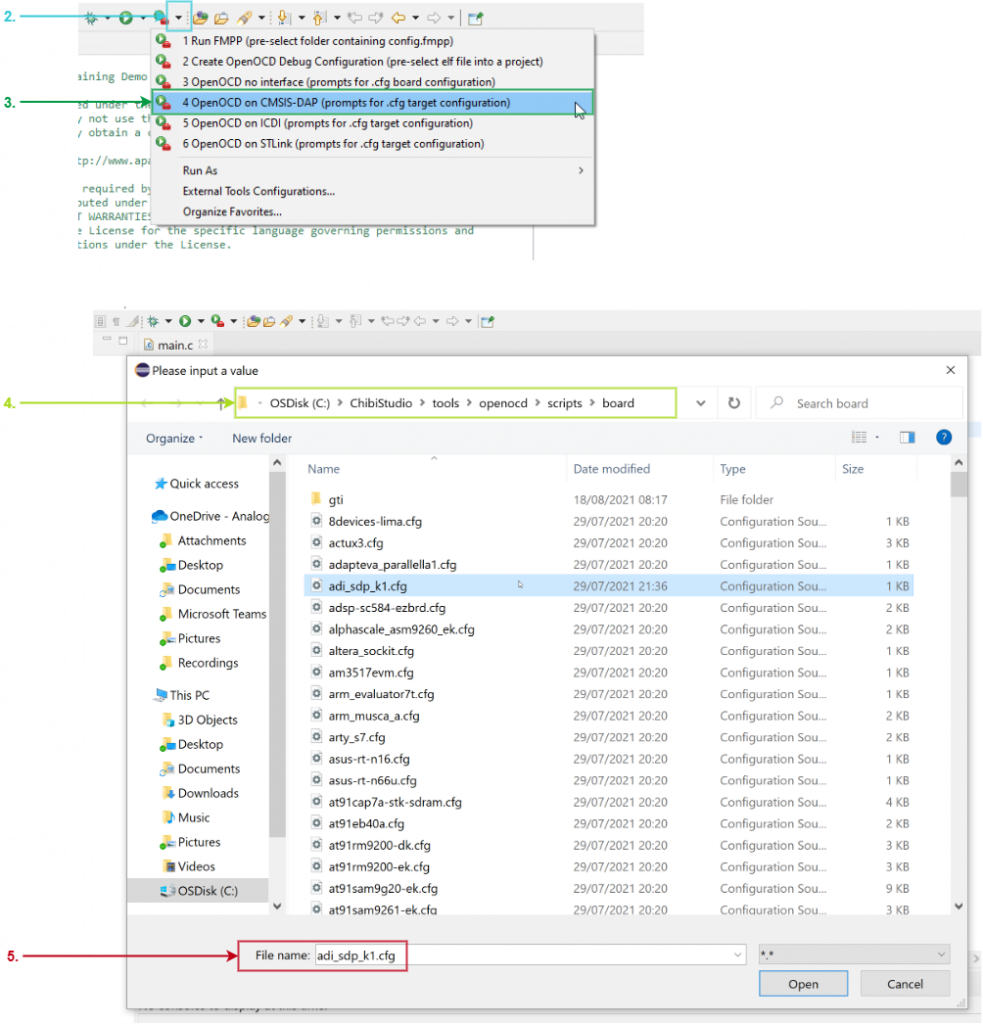
- Click External Tools menu (downward facing black arrow)
- Choose OpenOCD on CMSIS-DAP (prompts for .cfg target configuration) (Note: the menu entry depends on the debugger in use)
- Follow this path: C:\ChibiStudio\tools\openocd\scripts\boards
- Select the configuration source file adi_sdp_k1.cfg (Note: the script file depends on the microcontroller in use)
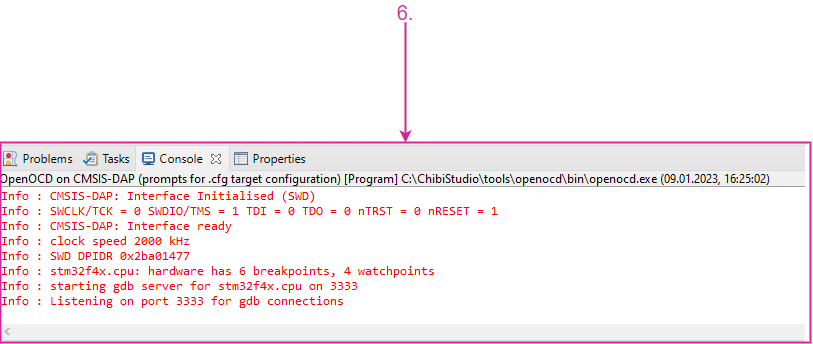
- Read successful message on the Console
Flash & Run the project
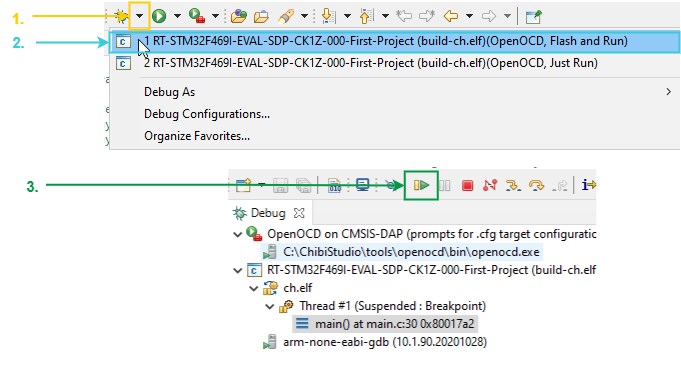
- Click Debug menu (downward facing black arrow)
- Select <…ProjectName…> (build-ch.elf)(OpenOCD, Flash and Run). You will be transferred to the Debug Perspective.
- Press the Resume button. The project is now being flashed and running on your microcontroller.
Thank you very much for the detailed guide.
It seems there is a small difference in the image and description when selecting the *.cfg file for launching the open OCD.
Step 5 – mentions that – select “stm32f4x.cfg” but in the image it selects “adi_sdp_k1.cfg” file.
Hi anon,
thanks for reporting. I updated the article accordingly. The reason behind the misalignment is that you could also pick the script directly for the target in use under C:\ChibiStudio\tools\openocd\scripts\target. And in the specific case of the SDP-K1, the target is an STM32F469 hence stm32f4x.cfg.
Hello! I’m trying to get an Example code (“RT-STM32F401RE-NUCLEO64-PWM-ICU”) to work and the very detailed directions are super helpful. I did want to mention I was not able to complete 2.2 Step 3 (“OpenOCD on CMSIS-DAP…”) but was able to get the correct response using “OpenOCD on ST-Link…”
The trouble I’m still having is with the debuger displaying Experssions. The variables I’m trying to dispaly are “last_width” and “last_period” are they are noted with
“Error: Failed to execute MI command:
-data-evaluate-expression last_width
Error message from debugger back end:
Missing ELF symbol “last_width”.”
But it I look into the “icup->wccrp”, the correct value is displayed. I believe it just something with the debugger not being configuered properly. If anyone could sugges something, I would appreciate it.
Thanks,
Ben
Hey Ben,
thanks for writing. It is normal that you had to use OpenOCD on STLink v2. The choice of the interface depends on the debugger that you use. In case of many development kits it is already included on the board, so if you check the features of the Nucleo, you will find out that it comes with STLink and not CMSIS Dap.
For the other problem, did you try to disable the optimization in the Makefile?
Hello, I am using a nucleo board and I am having trouble with step 2. Whenever hit OpenOCD with STLink, it gives me this:
Open On-Chip Debugger 0.11.0
Licensed under GNU GPL v2
For bug reports, read
http://openocd.org/doc/doxygen/bugs.html
Warn : Interface already configured, ignoring
Error: already specified hl_layout stlink
Info : The selected transport took over low-level target control. The results might differ compared to plain JTAG/SWD
srst_only separate srst_nogate srst_open_drain connect_deassert_srst
Info : Listening on port 6666 for tcl connections
Info : Listening on port 4444 for telnet connections
Info : clock speed 2000 kHz
Info : STLINK V2J33M25 (API v2) VID:PID 0483:374B
Info : Target voltage: 3.252984
Info : stm32f4x.cpu: hardware has 6 breakpoints, 4 watchpoints
Info : starting gdb server for stm32f4x.cpu on 3333
Info : Listening on port 3333 for gdb connections
Any idea why I am hitting this wall. This is my first time trying to program this board and I am really struggling. Thanks
Hi Nathan,
this is perfectly fine. It means that you launched the OpenOCD properly on your probe. I can understand that everything is fine because OpenOCD recognized some target info (voltage, breakpoints, watchpoints).
However this is just half step. Now the GDB server is listening on the port 3333. You need to launch the debug configuration to start the debugging session (see 2.3)
Hello, now I am getting this error message when performing 2.3
Error in final launch sequence:
Failed to execute MI command:
-target-select remote localhost:3333
Error message from debugger back end:
localhost:3333: Connection timed out.
Failed to execute MI command:
-target-select remote localhost:3333
Error message from debugger back end:
localhost:3333: Connection timed out.
localhost:3333: Connection timed out.
Not sure when it is not connecting. Any ideas?
Hi,
I am new to ChibiOS and ChibiStudio and I am trying to run the new demo RT-STM32H563ZI-NUCLEO144. Unfortunately, it seems that OpenOCD does not support STM32H5x with premade configuration files. Do you know how I can create my own? Or could you maybe let me know how I can set up the project in a different development environment?
Thanks and kind regards,
Julia
Hi Julia,
if the support for the H5 has been added you may they to build OpenOCD from scratch.
Look at this guide
Building OpenOCD under Windows using MSYS2
Hello –
I am attempting to follow the steps under “2.2 Launching OpenOCD” currently. However, the following is the console output I receive:
Open On-Chip Debugger 0.11.0+dev-00433-g97db87c22 (2021-10-28-12:22)
Licensed under GNU GPL v2
For bug reports, read
http://openocd.org/doc/doxygen/bugs.html
Warn : Interface already configured, ignoring
srst_only separate srst_nogate srst_open_drain connect_deassert_srst
Info : Listening on port 6666 for tcl connections
Info : Listening on port 4444 for telnet connections
Error: unable to find a matching CMSIS-DAP device
Could you please provide some guidance about the error?
Thanks,
John
I should also note that I am using Ubuntu 24.04 as my OS.